
Disclosure: This post may contain affiliate links, meaning I get a commission if you decide to make a purchase through my links at no cost to you. I am a REALTOR® licensed in the state of Utah, License No. 11785411-SA00 and affiliated with Presidio Real Estate (South Jordan).
Discover & Sort Sensory Bin: Is It A Fossil? Is It A Rock? Is It A Seashell?
Do you have a budding paleontologist? Or a kid who loves picking up rocks and seashells? Digging for treasure is exciting for kids AND adults. This discovery bin full of fossils, rocks, and seashells is a super fun addition to an Earth science unit.


Pooh Bear LOVED this sensory bin and played with it over and over. Besides the obvious scientific value of learning about dinosaurs, rocks, and seashells – how they’re formed and where we can find them – it also gave us a TON of opportunities to practice our math skills too.
Step By Step
How To Build Your Fossil, Rock, & Seashell Sensory Bin


Ways To Play With Your Fossil, Rock, Seashell Sensory Bin
We’ve been learning a lot about dinosaurs, so it was the perfect opportunity to create this fun bin and talk about the differences between fossils, rocks, and seashells. How are they different? How are they alike? How are they the same?
Not only did we sort out the different objects by classifying them, we also sorted them out by characteristics such as smooth or bumpy. Then, we moved on to counting how many of each we had and made a graph. Finally, we used her Lakeshore Learning Scale to compare and weigh our objects.
If you don’t want to use the real thing or buy plastic replicas, I created a few printable sheets for you. Subscribe below, and I’ll send you your free sheets. Just print on thick cardstock, cut out the fossils, rocks, and shells to bury. For extra durability for repeated use, I recommend laminating.
You can use these sheets to practice phonics, subitizing, or sight words. Just print out two copies of each objects page. Keep one page intact while you cut the other matching objects out. Then, after laminating, use a dry erase marker to add numbers, words, or letters. For example, on the intact page you could write uppercase letters and on the cut-outs, write lowercase letters they can match to the sheet once they’ve dug up the object.
Select Your Filler
You could use real dirt, sand, kinetic sand, or even ground up Cheerios or other cereal for an edible version.
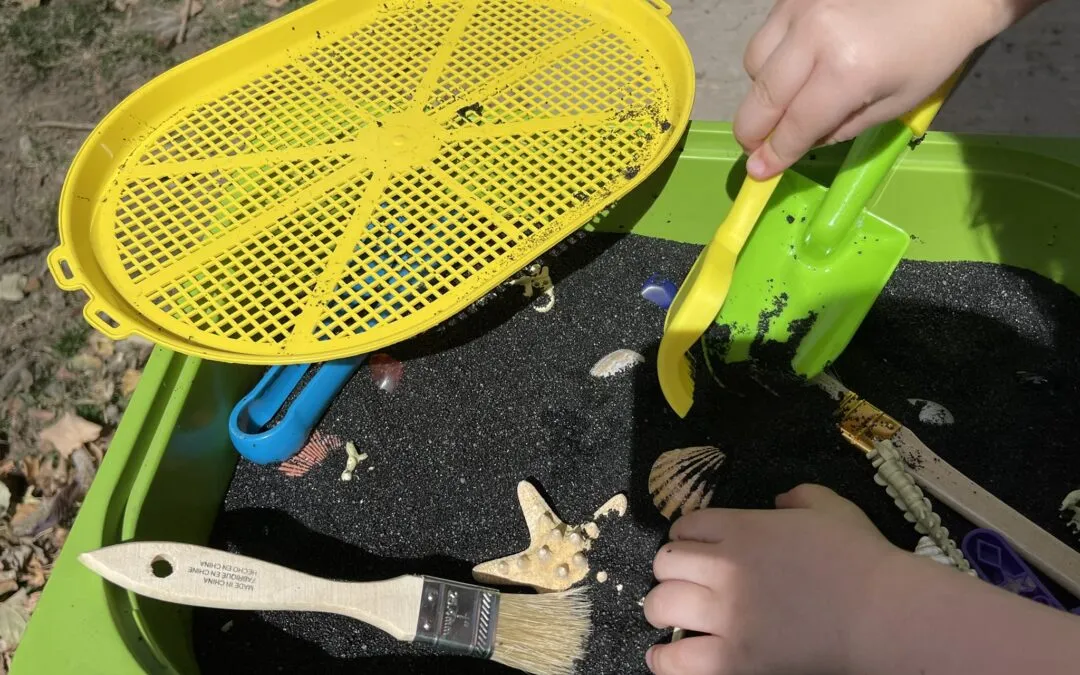
For this bin, I wanted her to brush sand or dirt away from the object to carefully uncover it, much like a real Paleontologist or rockhound would when digging up a valuable crystal. Kinetic sand would be too sticky for that, so I settled on black aquarium sand from our local pet shop.
Grab Your Tools
Most of the tools I used in this bin, I already had on hand. I grabbed wide flat paint brushes from my art kit, a plastic trowel from a playdough kit, a small play shovel, a rake, and a sifter from a summer sand kit, and kid tweezers.
Add Fossils, Seashells, and Rocks
While I have real fossils in my collection, I didn’t want 600 million year old relics destroyed so I grabbed this Smithsonian Diggin’ Up Dinosaurs Kit.
The seashells were found at Hobby Lobby and the rocks are various crystals I’ve collected and tumbled over the years.
0 Comments